Showing posts with label Easter. Show all posts

Monday, March 5, 2012

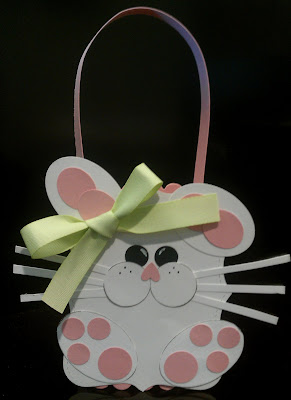
Bunny Basket


SUPPLIES:
· Stamps – none
· Card Stock – Whisper White, Blushing Bride
· Ink – Basic Black, Basic Gray, White Gel Pen, Basic Black Marker
· Accessories – Certainly Celery Ribbon, Sponge
· Tools – Big Shot, Top Note die, Scallop Square Die, Wide Oval Punch, Large Oval Punch, 1 ¼” Circle Punch, 1” Circle Punch, ½” Circle Punch, Heart to Heart Punch
INSTRUCTIONS:
Use the wide oval punch for the outer ear and feet and the large oval punch for the inside of the ear. Use the Circle Punches for the toes and feet pads and the small heart punch (turned upside down) for the nose. Cut scraps of white thin strips for whiskers. Sponge ears, feet and cheeks with Basic Gray ink. Use the Basic Black marker for the dots on the cheeks and the white gel pen for the eyes. Cut a strip of Blushing Bride cardstock for the handle.

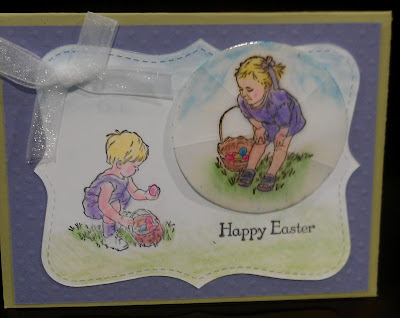
Heaven Blessed Cracked Glass Card

SUPPLIES:
· Stamps – Heaven Blessed (from new mini catalog)
· Card Stock – Pear Pizzazz, Wisteria Wonder, Whisper White
· Ink – Versamark, Chalks
· Accessories – Clear Embossing Powder, Whisper White Taffeta Ribbon
· Tools – Big Shot, Top Note Die, Polka Dot Textures Die, Heat Gun, Powder Pals Tray, 2 ½ Inch Circle Punch

INSTRUCTIONS:Cover the stamped image thoroughly with VersaMark ink. Sprinkle a heavy layer of Stampin' Up!'s Glassy Glaze Enamel or Clear Embossing Powder over VersaMark. TIP: The Powder Pals make it easy to return the excess back to the container for reuse. Heat Emboss with a Heat Tool. Allow to cool completely. REPEAT Versamark and Heat Emboss with Glassy Glaze or Clear Embossing Powder three more times. The goal is to build up a thick layer that can be cracked. After cool (TIP: I tossed mine in the freezer for a few minutes), bend panel to create cracked "glass" lines where you want them.

Related Posts Plugin for WordPress, Blogger...