Thursday, September 20, 2012
Halloween Ghost and Bat Card
Paper: Basic Black, Only Orange, Whisper White
Ink: Basic Black
Tools: Owl Punch, Big Shot, Spider Web Textured Impressions Embossing Folder, Bat Punch
Accessories: Ribbon
Instructions: For the bat, use the owl punch and the bat punch. Cut the bat figure in half and glue to the owl body. For the ghost, use the owl punch, cut the feet off and turn upside down!
Halloween Bat and Cobweb Card
Paper: Basic Black, Whisper White, Rich Razzleberry, Vellum
Ink: Basic Black
Tools: Big Shot, Spider Web Textured Impressions Embossing Folder, Bat Punch, Sponge
Accessories: Ribbon
Instructions: Sponge the entire card after assembled for a spookier look!
Halloween Mini Toilet Paper Roll Album
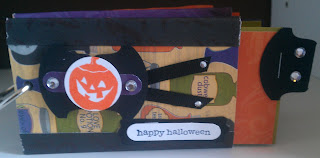
Paper: Basic Black, Whisper White, DSP, Concord Crush, Only Orange
Ink: Basic Black, Only Orange
Tools: Stapler, Crop-A-Dile, Stapler, Round Tab Punch, 2 3/8” Scallop Circle Punch, Decorative Label Punch, 1 3/8” Circle Punch, 1” Circle Punch, Scallop Square Punch, Word Window Punch, Modern Label Punch
Accessories: Binder ring, Staples, Rhinestones, Toilet Paper Rolls
Halloween Ornament
Paper: Basic Black, Whisper White, DSP
Ink: Basic Black, Concord Crush
Tools: 1/8” hole punch, 2 ½” circle punch, ¾” circle punch, Score Pal, Big Shot, Spider Web Textured Impressions Embossing Folder, Glue Gun, Sticky Strip
Accessories: Ribbon, Buttons, White String
Instructions: For the “Yo-Yo”, cut a strip of 2 ½” by 12” piece of Designer Paper. Use the Score Pal to score every ¼”. Fold back and forth and tape ends together with Sticky Strip. Cut a circle scrap piece of paper, approx. 1 ½” in diameter and glue the “Yo-Yo” down on the scrap circle piece until it is flat and the middle is closed up.
Bat Purse
Ink: White Gel Pen
Tools: 1/8” hole punch, 2 ½” circle punch, ¾” circle punch, ½” circle punch, Big Shot, Petite Purse Bigz Die
Accessories: Silver Brads
Instructions: For the Bat wings use the 2 1/2" circle punch (cut in half to make wings). Use the 3/4" circle punch along the bottom edge to make points. Use the 3/4" Circle punch and the 1/2" circle punch for the eyes.
Saturday, August 11, 2012
TAX FREE Weekend for Massachusetts!!
TAX FREE Weekend for Massachusetts!
 Massachusetts is having a TAX FREE weekend this weekend Saturday, August 11 & Sunday, August 12!!The state of Massachusetts is having a sales tax holiday for for all tangible personal property up to $2,500 from August 11-12. This means all Stampin’ Up!® products available in our catalogs will be state tax-free during the holiday period. WAHOO!!!!
Details of this special:
- Orders must be placed in my online store.
- Orders must be placed on the days of eitherSaturday, Aug 11 & Sunday, Aug 12
- Orders must be shipped to an address in the state of Massachusetts
Sunday, April 1, 2012
You're My Type Notepad
Things I Love Mini Card Pack
Bundled For Mom Mother's Day Card
Petite Purse
Monday, March 5, 2012
Bunny Basket
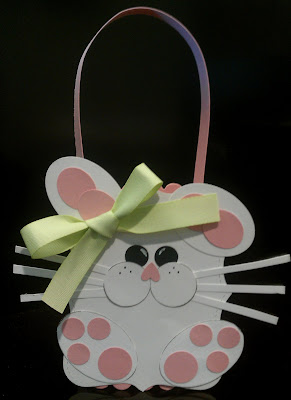
SUPPLIES:
· Stamps – none
· Card Stock – Whisper White, Blushing Bride
· Ink – Basic Black, Basic Gray, White Gel Pen, Basic Black Marker
· Accessories – Certainly Celery Ribbon, Sponge
· Tools – Big Shot, Top Note die, Scallop Square Die, Wide Oval Punch, Large Oval Punch, 1 ¼” Circle Punch, 1” Circle Punch, ½” Circle Punch, Heart to Heart Punch
INSTRUCTIONS:
Use the wide oval punch for the outer ear and feet and the large oval punch for the inside of the ear. Use the Circle Punches for the toes and feet pads and the small heart punch (turned upside down) for the nose. Cut scraps of white thin strips for whiskers. Sponge ears, feet and cheeks with Basic Gray ink. Use the Basic Black marker for the dots on the cheeks and the white gel pen for the eyes. Cut a strip of Blushing Bride cardstock for the handle.
Tea Shoppe Tea Bag Holder
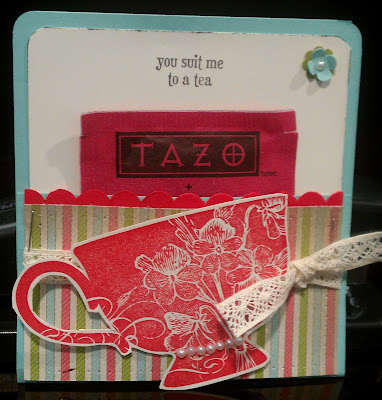
This would be great for a gift topper or to accompany a package of tissues and chicken noodle soup for a sick friend!
SUPPLIES:
· Stamps – Tea Shoppe (from new mini catalog)
· Card Stock – Pool Party, Poppy Parade, Pear Pizzazz, Very Vanilla, Everyday Enchantment DSP (from new mini catalog)
· Ink – Poppy Parade, Chocolate Chip
· Accessories – Chantilly Ribbon, Tiny Pearls, Tea Bag, Dimensionals
· Tools – Stapler, Scallop Border Punch, Mat Pack, Itty Bitty Shapes Punches
Heaven Blessed Cracked Glass Card
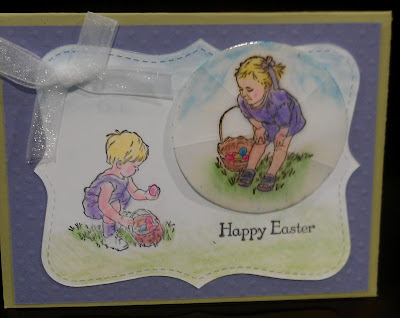 SUPPLIES:
· Stamps – Heaven Blessed (from new mini catalog)
· Card Stock – Pear Pizzazz, Wisteria Wonder, Whisper White
· Ink – Versamark, Chalks
· Accessories – Clear Embossing Powder, Whisper White Taffeta Ribbon
· Tools – Big Shot, Top Note Die, Polka Dot Textures Die, Heat Gun, Powder Pals Tray, 2 ½ Inch Circle Punch
INSTRUCTIONS:Cover the stamped image thoroughly with VersaMark ink. Sprinkle a heavy layer of Stampin' Up!'s Glassy Glaze Enamel or Clear Embossing Powder over VersaMark. TIP: The Powder Pals make it easy to return the excess back to the container for reuse. Heat Emboss with a Heat Tool. Allow to cool completely. REPEAT Versamark and Heat Emboss with Glassy Glaze or Clear Embossing Powder three more times. The goal is to build up a thick layer that can be cracked. After cool (TIP: I tossed mine in the freezer for a few minutes), bend panel to create cracked "glass" lines where you want them.
Send Me Soaring Waterfall Card
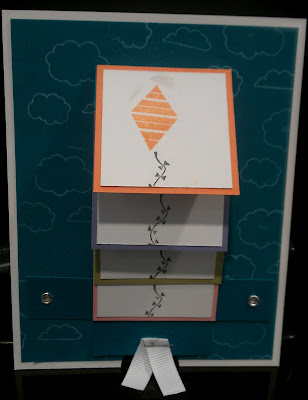
· Stamps – Send Me Soaring (from the new mini catalog)
· Card Stock – Whisper White, Island Indigo, Pool Party, Lucky Limeade, Calypso Coral, Wisteria Wonder
· Ink – Basic Black, Island Indigo, Pool Party, Lucky Limeade, Calypso Coral, Wisteria Wonder, Craft White
· Accessories – Whisper White Grossgrain Ribbon, Eyelets
· Tools – Crop-A-Dile, 1” Circle Punch, Stapler
Tuesday, February 7, 2012
Shamrock Card
Milk Carton Favor
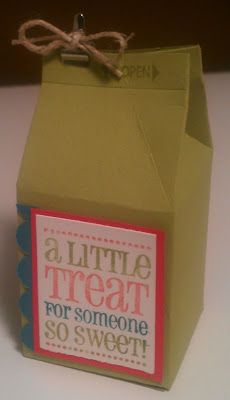
· Stamps – Got Treats (119114 $24.95)
· Card Stock – Whisper White (100730 $8.50), Poppy Parade (119793 $6.95), Pear Pizzazz (119795 $6.95), Island Indigo (122923 $6.95)
· Ink – Poppy Parade Marker (119801 $14.95 comes with set), Pear Pizzazz Marker (119801 $14.95 comes with set), Island Indigo Marker (119801 $14.95 comes with set)
· Accessories – Big Shot (113439 $99.95), Mini Milk Carton Die (109857 $12.95), Mini Library Clips (109857 $12.95), Hemp Twine (100982 $2.95)
· Punches – Scallop Edge (119882 $15.95)
INSTRUCTIONS:Run the Mini Milk Carton Die with Pear Pizzazz cardstock through the Big Shot Die Machine. Fold all creases. Adhere bottom and side of carton with sticky strip.
Cracked Glass Card
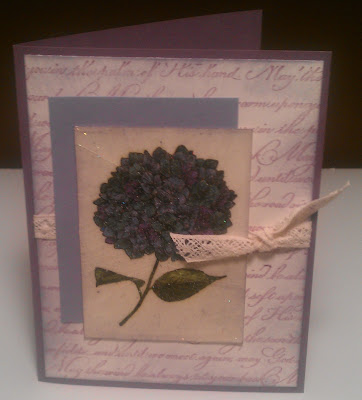
SUPPLIES:
· Stamps – Because I Care (discontinued), En Francais (109521 $17.95)
· Card Stock – Perfect Plum (122922 $6.95), Wisteria Wonder (122922 $6.95), Very Vanilla (101650 $6.95)
· Ink – Perfect Plum (101437 $5.95), Perfect Plum Marker (100035 $3.50), Wisteria Wonder Marker (1230012 $14.95 comes with in-color set), Old Olive Marker (100079 $3.50), Versamark (102283 $7.50)
· Accessories – Clear Embossing Powder (109130 $4.75), Stampin' Sponge (101610 $3.50)
· Tools – Heat Gun (100005 $29.95), Powder Pals Tray (102197 $19.95)
INSTRUCTIONS:Gather Powder Pals, Glassy Glaze, Heat Tool and VersaMark. Cover the stamped image panel thoroughly with VersaMark ink. Sprinkle a heavy layer of Stampin' Up!'s Glassy Glaze Enamel or Clear Embossing Powder over VersaMark. TIP: The Powder Pals make it easy to return the excess back to the container for reuse. Heat Emboss with a Heat Tool. Allow to cool completely. REPEAT Versamark and Heat Emboss with Glassy Glaze or Clear Embossing Powder two more times. The goal is to build up a thick layer that can be cracked. After cool (TIP: I tossed mine in the freezer for a few minutes), bend panel to create cracked "glass" lines where you want them.
Birthday Sidestair Card
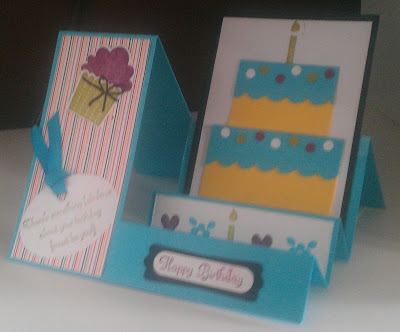
• Stamp Sets – Create A Cupcake (121915 $22.95)
• Card stock – Whisper White (100730 $8.50), Basic Black (121045 $6.95), Tempting Turquoise (102067 $6.95), Daffodil Delight (119683 $6.95), DSP (124339 $10.95)
• Ink – Rich Razzleberry(115658 $5.95), Basic Black (101179 $5.95), Tempting Turquoise (100814 $5.95), Old Olive (102277 $5.95)
• Ribbon – Tempting Turquoise Ribbon (124323 $4.95)
• Accessories – Stampin' Dimensionals (104430 $3.95), Snail Adhesive (104332 $6.95)
• Punches – Modern Label (119849 $16.95),Word Window (119857 $15.95), XL Oval (119859 $16.95), Scallop Edge Border (119882 $15.95), Crop-A-Dile (108362 $29.95), Cupcake Builder (121807 $16.95)
Sunday, January 15, 2012
Valentine's P.S. I Love You Tag Card
Valentine’s P.S. I Love You Collage Card
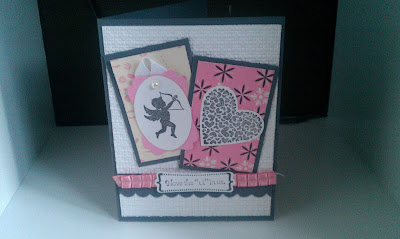
STAMP SET
PS I Love You
CARD STOCK
Whisper White, Basic Gray, DSP, Pretty in Pink
INK
Basic Black
ACCESSORIES
Basic Pearls, Blushing Bride Pleated Satin Ribbon, White Grosgrain Ribbon
TOOLS
Big Shot, Square Lattice Embossing Folder, Oval Punch, Heart Punch, Scallop Border Punch
ADHESIVES
Snail Adhesive, Sticky Strip, Mini Glue Dots
Valentine’s P.S. I Love You Collage

STAMP SET
PS I Love You
INK
Basic Black, Real Red, Blushing Bride, Rose Romance
CARD STOCK
Basic Black, Silver, Whisper White
ACCESSORIES
White Ribbon, Key Rings from Key Tags, Blushing Bride Smooch Spray
TOOLS
Heart Punch, Corner Punch, Heart to Heart Punch
ADHESIVES
Snail Adhesive, Sticky Strip, Mini Glue Dots, Dimensionals
Valentine's Centerpiece
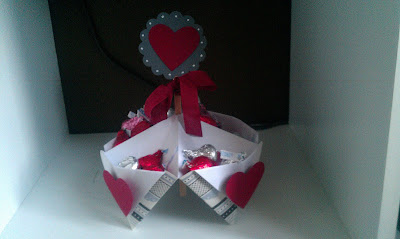
CARD STOCK
DSP, Cherry Cobbler, Basic Gray
ACCESSORIES
Cherry Cobbler Seam Binding Ribbon, White Gen Pen, wooden stick
TOOLS
Heart Punch, Scallop Circle Punch
ADHESIVES
Pop Up Dots, Snail Adhesive
INSTRUCTIONS
Place a 12-inch square of Designer Paper face down. Fold in half diagonally, and unfold. Fold on the other diagonal and unfold. Fold in each corner to the center point, forming a smaller square. Turn paper over, and fold in all corners so they meet, forming an even smaller square. Fold square in half horizontally to form a rectangle; crease, and unfold so you are back at the square. Fold in half vertically; crease and unfold. Turn square over, and slip one finger under each flap. Press your fingers – and the points of the fortune teller – together to form pockets. Place point side down, turn down flap of each pocket, and fill with desired candy.


